
Normally websites get indexed by google automatically. There’s also sitemap to help us announce what should be crawled by google or certain pages exist on our website. For each update of our website the search engine crawlers from google visit our website and update their indexes with our pages information. But waiting for google bots to scan our pages automatically can be a slow process. Because certain information have a short expiry date and them staying in google index is not useful. That’s where Google Indexing API comes in.
This API helps us to index a page on google records faster than other methods.
The Indexing API allows any site owner to directly notify Google when pages are added or removed. This allows Google to schedule pages for a fresh crawl, which can lead to higher quality user traffic. Currently, the Indexing API can only be used to crawl pages with either JobPosting or BroadcastEvent embedded in a VideoObject. For websites with many short-lived pages like job postings or livestream videos, the Indexing API keeps content fresh in search results because it allows updates to be pushed individually.
The Indexing API offers us three mode of requests which can change different things about our URL. Also worth nothing that this API is not meant to be used for general purpose sites. Google propose to use this API with websites that have some types of content with short expiry date. These types of content are not meant to last for a long time in google index and they also need to get indexed as soon as possible. Job Postings and events are good examples of this type of content.
A Brief Look At The Google Indexing API Endpoints
In this section I’m going to first explain what type of operation can be done with these APIs. Then in subsequent sections, I’ll go into detail about how to setup our account and how to use it within the context of a dot net framework application.
Post a new URL / Update the existing one
The first feature is to add or update a URL from Google’s indexes. In order to do that, we use the same URL and same type in the payload. Google on its own is going to figure out whether this URL already existed in their indexes. If the URL already have existed in their index, then this request is going to be an update. If the URL did not exist in their indexes, then this request is considered as creation or rather a request for the page to be added to their index. With this mode we can post a new URL or update a URL that might have already existed. In order to do that we sent a request to this end point like so.
We pass the URL and the type of operation that we want to perform.
Remove a URL
This feature allows us to remove the URL from Google’s index. Notice that we’re using the same endpoint this time also, but different type. We might want to do that after the job application validity period is over and serving that page does not serve any purpose. In order to remove a URL from their index we should use this end point with following parameters.
Status of a URL
We can also look for the status of a URL and check to see when was the last time that URL was crawled. The information that we get might look something like this.
Sending Batch Requests
We can also send batch requests to google indexing API and update the indexes related to a set of addresses. In order to do that we need to use a different endpoint that google provides.
To reduce the number of HTTP connections your client has to make, you can combine up to 100 calls to the Indexing API into a single HTTP request. You do this in a multi-part request called a batch.
The body of a batch request contains multiple parts. Each part is itself a complete HTTP request, with its own verb, URL, headers, and body. Each part within a batch request cannot exceed 1MB in size.
Also, worth mentioning that we don’t directly make a call to google APIs. We use the google .Net libraries to do that. I made a complete working example that we can use to achieve all of this. In subsequent sections I will include the source code to the example and explain how we should use it. The only thing that remain is to setup the account that will be used with this APIs.
But there are certain configuration that needs to be in place before we can start using the API.
Setting Up the Necessary Account and Services Before Using Google Indexing API
I’m going to explain step by step how the account should be set up.
Step 1 – Create a new project
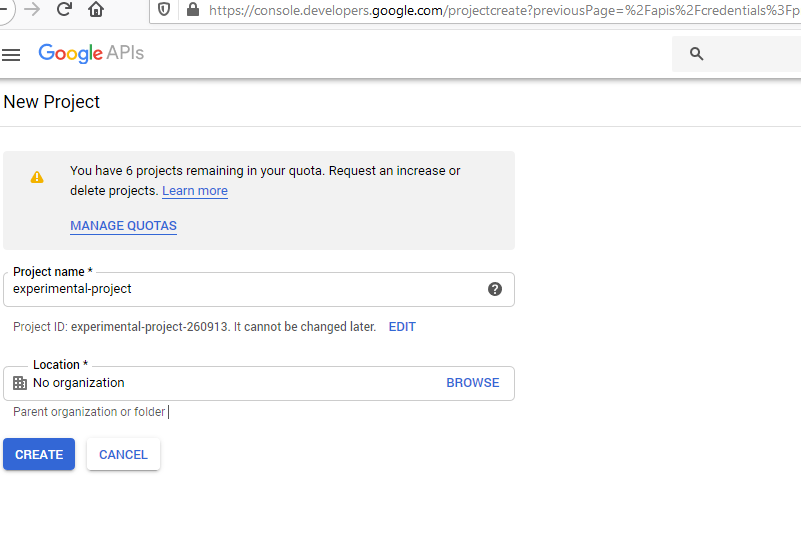
The first step is to create a project that will be associated with the indexing API. If a project already exist we can also use that project. That’s because we also need to create another type of account and we can associate that account with the indexing API.
Step 2 – Create a Service Account
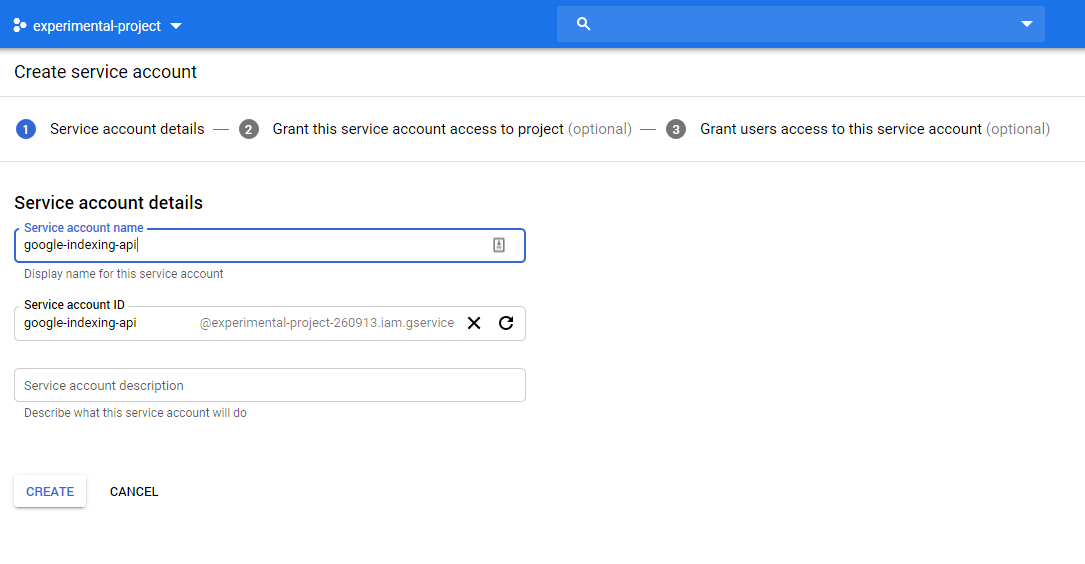
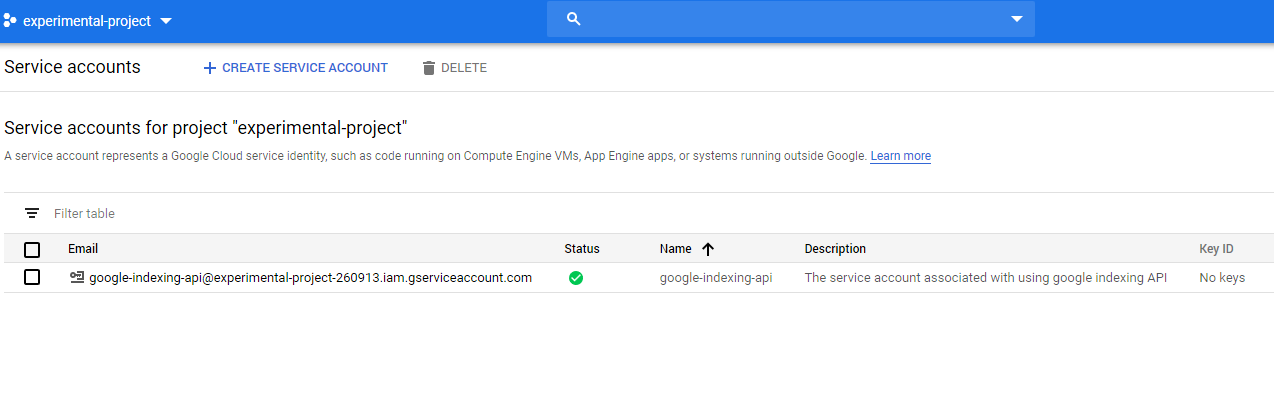
The second step is creating the Service account. In order to do that we first need to select our project that we’ve created/chosen in previous step. After going through the creation process we receive an email associated with the service account.
Step 3 – Activate the google console dashboard and Adding The Service Account Email to Google Console
The third step we need to take is to add our website to google console and activate it. The process of activation can be achieved with different methods. For example, google asks to include certain files at the root of the web server. Another method is to include a certain script in the head part of the site index etc.
If the activation was successful, now we need to add the email that we received from the previous step (creating service account) as the owner of the website. In order to do that we should navigate to Settings => Users and Permissions.
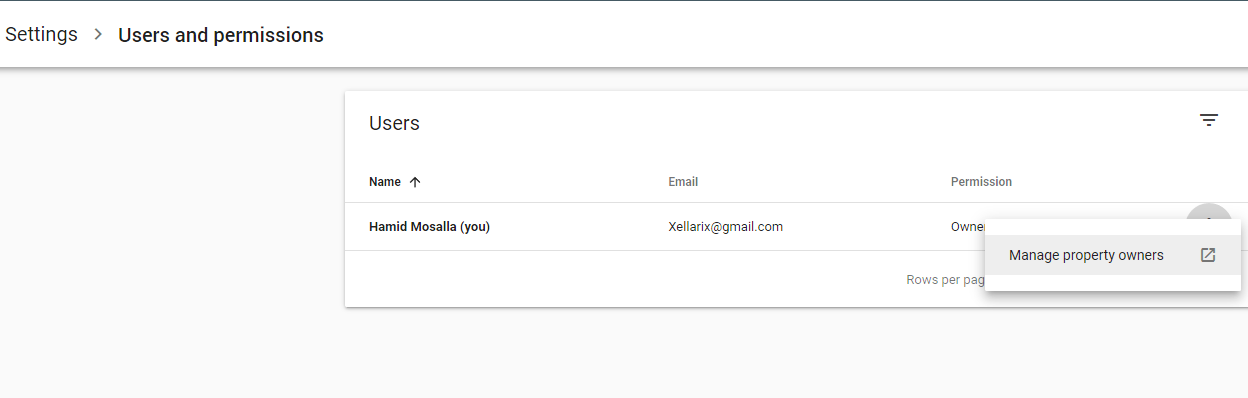
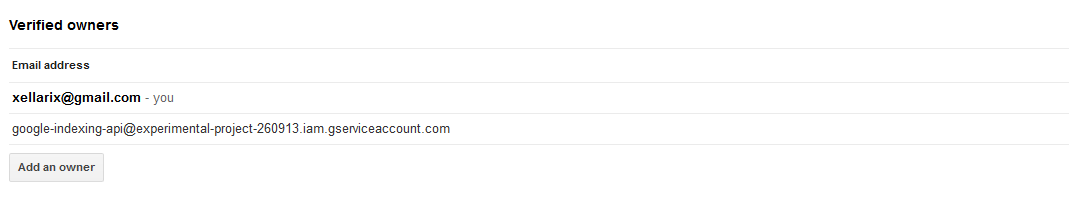
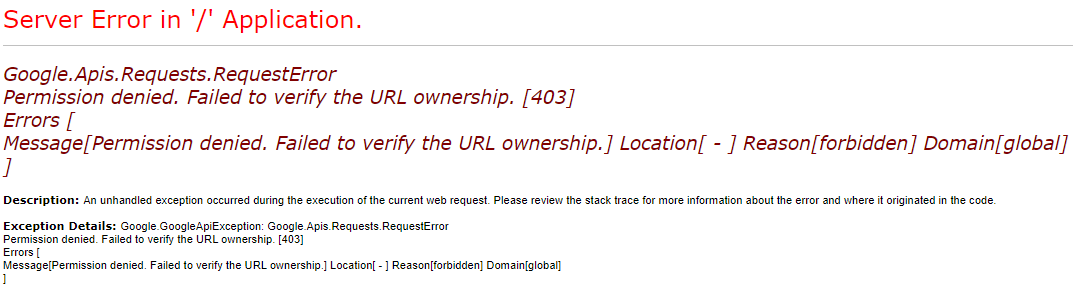
It is important to note that we can only update the information about an address through indexing API if we’re the verified owner of it. Otherwise we’re going to get an error when we make a request.
Now that our service account is fully setup and associated with our service account, we can go ahead and create the private key that we then use to make request to the google indexing API.
Step 4 – Creating the Private Key associated with our Service Account
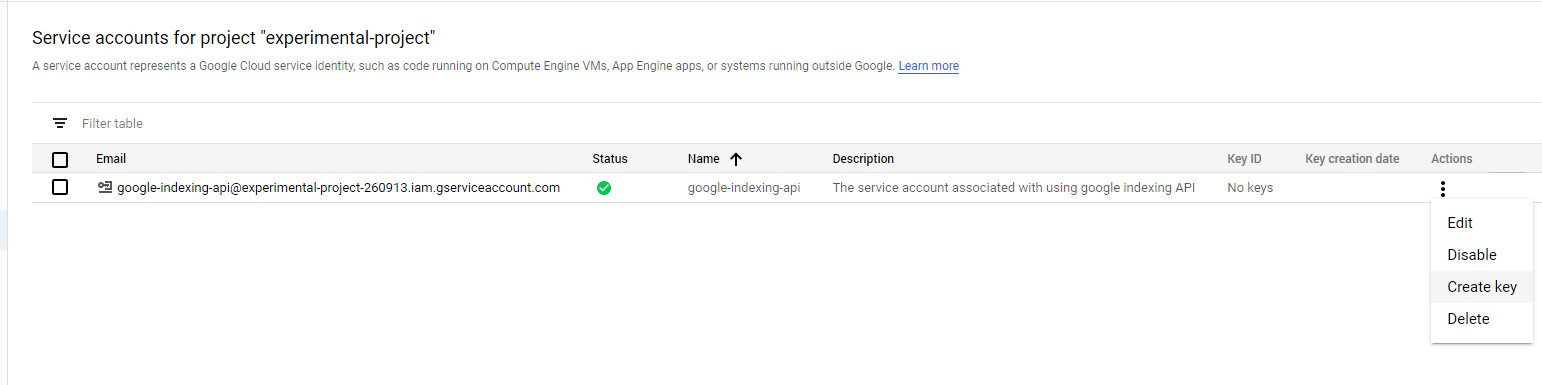
The fourth step is to create a JSON private key that we’re going to use to get our access token. We need to download this JSON file and feed it to the google libraries to create our access token. You can find how to do that in the sample application that I’ll include in subsequent section.
Step 5 – Activating the Indexing API From google console

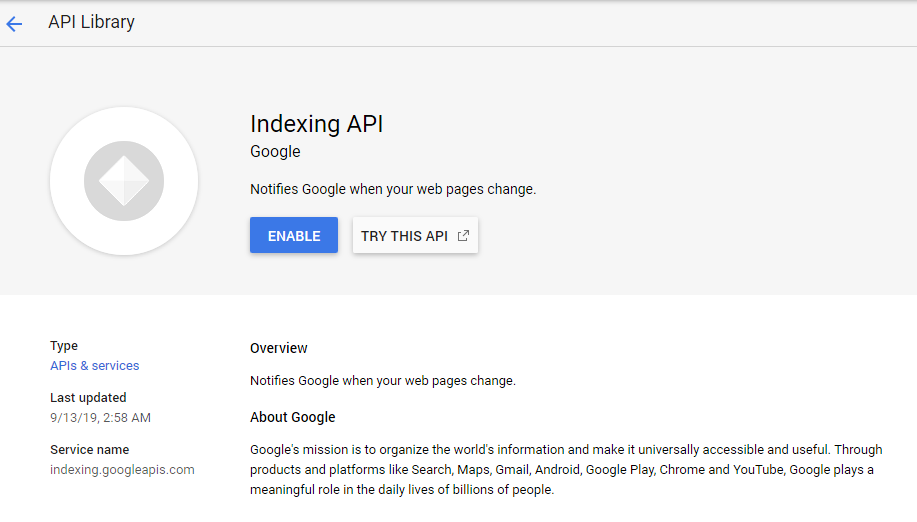
After taking this step now we’re ready to use the API with our configuration.
Using Google API Client Library for .NET
Google APIs give you programmatic access to Google Maps, Google Drive, YouTube, and many other Google products. To make coding against these APIs easier, Google provides client libraries that can reduce the amount of code you need to write and make your code more robust. The libraries can also make it simpler to set up authorization and authentication.
I’ve created a sample app that we can use to make our requests without the need to write up a manual HTTP request. I’ve used the google client API libraries for .Net but we don’t actually need to use any libraries. We can create the HTTP requests ourselves and send them. But I think using the provided .Net libraries is much easier. Although I have to say that it would’ve helped a lot if we had a more through documentation on the usage.
Bear in mind that in order for the sample application to work, we need to be the verified owner of the URL that we’re using in the request. In order to do that we need to have the correct private key that is associated with a service account which in turn is associated with the google search console with ownership verified and the service account email added. I will go through methods and services that are available in this sample project. I’m going to try to explain a few things about this library so we can see the general way this API can be used.
Obtaining Google Credential/Access Token
The first step is to obtain the google credentials. In this service we can create the necessary credentials needed to call the API. The method GetGoogleCredential is used to create the necessary credentials which is contained within an object. In order to do that we need to copy our private key its corresponding folder for it to be read and create our credential. We do that by using our private keys and reading it as a steam and pass it down to the method that google provided to get the google credential.
Update/Add/Delete URL to Google Index
We can use the same end point to add or update or delete a URL. This all happens based on the previous state of the URL and the request body that sent to the endpoint. Here we make a request using the credential that we obtained from previous step. To make a request we use the class IndexingService which is a class that comes as part of google library. We need to initialize it with the information that was contained inside our private key. We pass the google credential into the initializer of the class. Then we can make a request using the UrlNotificationsResource.PublishRequest class by passing the IndexingService instance down to its constructor. In general this method adds the page to google index if it doesn’t already exist, if the page already exist in google index, it only notify the google bots for a new crawl. Here’s the code related to what I’ve explained.
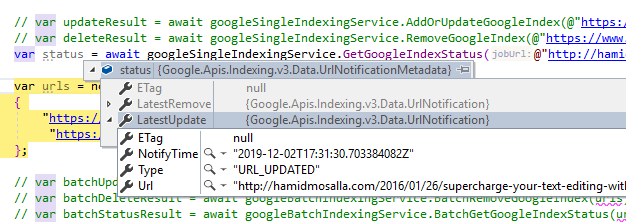
Receive The Status Of The URL Index
We can also receive the status for the URL index. We can see when this URL last indexed and when last deleted from the google index etc. The steps are the same as previous with the difference that this time we use the GetMetadataRequest class.
Here’s the result that we get after making this request.
Add/Update/Delete Batch URLs to Google Index
We can also make batch requests using the google API client library. the reason we might want to use this feature is that using this service is more efficient if we have a list of addresses that we want to update. Because for multiple URLs, it is going to make only 1 request for all of them. But there’s a limitation on the number of URL that we can send to the batch API at once. The limitation is 100 URLs at one time, but still if we have a lot of URL, it’s more efficient. You can read about the quota and limitation here. Here’s a method that can be used to make a batch request.
The steps about the credentials and IndexingService is basically the same as previous. Here we create a new instance of BatchRequest class to create batch requests. This class is going to use the previous value to authenticate itself with google API and and also everything related to auth with google are handled in those classes. Next step is to queue all the calls that we need to make with the value that we previously created. We need to pass down the googleIndexingApiClientService and and instance of UrlNotification in this case.
After queuing all the requests that are needed to be made, we can go ahead and execute the request using await request.ExecuteAsync(). By using the batch request endpoint only one request going over the wire and we don’t make multiple requests. That can save time and bandwidth.
Receive The Index Status Of A Batch Of URL
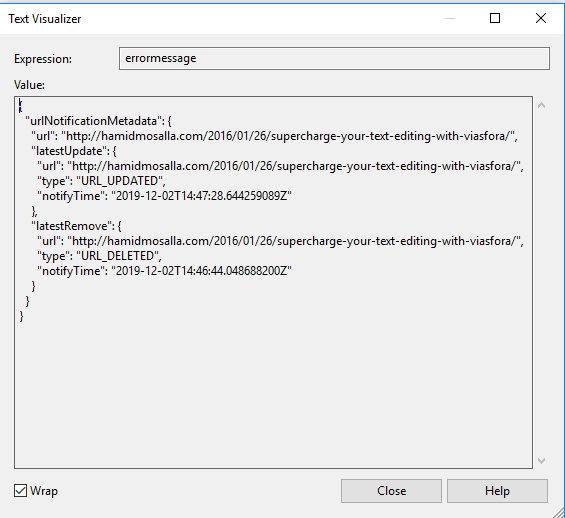
We can also receive the information about a collection of URLs using the batch endpoint. The general principle is the same as previous steps but this time we use the GetMetadataRequest class and UrlNotificationMetadata as our response type. Here’s the code related to what I’ve just explained.
Also there’s a fully functioning sample application that I made, you can find the link in the summary section.
Further Reading
Google APIs Client Library for .NET
How You Can Get Google To Crawl Your Website Instantly
Using OAuth 2.0 to Access Google APIs
SEO for Job Postings and how to post a Job on Google
Summary
In this post, we saw what Google Indexing API is and how it can help us index our pages on google faster. We also saw how to set up the services necessary to start using these APIs. Then we went through the Google API Client Library for .NET and how to use it through some examples. The sample project containing all the code that used in examples is available on GitHub.
You could just explain in a top down format how to use the API and not abstract everything out. Your git code has all your own hard-coded paths to files. Can’t you just explain how to use it in a hard-coded top down manner and then let us beginners abstract it out ourselves. You may have it working but it’s not easy to learn from your code examples. Sorry, just some honest feedback. Simple is always better.
No need to be sorry, I appreciate your honest feedback! There’s also a GitHub repository about this at the end of this post, I think reading that might be quite helpful.
Much appreciated brother,, you save my hours
Saved me a lot of time figuring out these things. Thanks.
Hello Hamid
have u ay idea abt how can i notice google that the link begin in XX date
content = {
“url”: “”,
“type”: “URL_UPDATED”
}
That was so helpful!!! Thank you!!!!!