
In my previous post, I’ve discussed how we can implement policy-based authorization to secure our API using JWT. But that wasn’t what I end-up using in production. Partly because the built-in mechanism of Asp.Net Core with JWT is not as powerful as IdentityServer4. Also I needed the single sign-on feature of IdentityServer4. There are two options for security when using IdentityServer4, with or without using ASP.NET Core Identity, I’m going to explain both.
Policy-based Authorization using Client Credentials
There are two options to secure an API using IdentityServer4 without relying on Asp.Net Core Identity. You can either use ClientCredentials grant type or you can use ResourceOwnerPassword grant type. Here I use TestUser for resource owner password grant type which shouldn’t be used for production. But the process itself works for any other kind of users. Just in case, I created a working sample code for this section, you can find it here.
Creating A Secured API
Let’s assume we have an API resource, one which only needs authentication, and one which need authentication and authorization both. Notice that I’ve used the Founder policy on ApiResourceWithPolicy controller.
You also need to install the package IdentityServer4.AccessTokenValidation. Then we can specify who is the Authority for authenticating the incoming request. Later we are going to implement that authority with IdentityServer4 and create a client to use that API. Last step is to add the policy which is Founder in our case.
Creating The Identity Server (IdentityServer4 Authority)
The next step is to create the actual authority who’s going to authenticate and authorize the request. You can find the basic steps of creating that here. After setting up the basic project and installing packages, we should configuring IdentityServer4.
First let’s create a class called Config, and specify our protected resources.
In GetApiResources method, we return a list of APIs that we’re going to protect. The first parameter of ApiResource’s constructor is the same name that we’ve used in Creating A Secured API step. Now that we’ve specified our resources, we can go ahead and create Clients and tell IdentityServer4 what resources this client has access to by setting the AllowedScopes.
In above code, two Clients are created. First one called client1 with grant type of GrantTypes.ClientCredentials. We also add the necessary claims to this client to be able to access the API that requires the presence of claims. One very important point here is to set the ClientClaimsPrefix property to empty string. Because if we don’t identity server is going to prefix the claims with client, for example client_Employee. Here’s what it looks like, picture taken from jwt.io.

If that happens the server that we send the access token to doesn’t going to recognize the claims, therefore deny access to the resource.
Our second client called ro.client1 which has the grant type of GrantTypes.ResourceOwnerPassword. That means we need to provide username and password along with client id and its secret when we want to use this client. So we should create our users to use them with our ro.client1, if we want to access the API that had policy.
Here I’ve added a TestUser called mosalla that has a claim type of Employee with the value of Mosalla. This directly corresponds to the policy that we set in the Creating A Secured API step, which was policy.RequireClaim("Employee", "Mosalla").
Next step is to add the identity server and its configurations that we just set up to the DI container of our project.
You might notice that there an extension method called AddProfileService which add the class ProfileService. We need this for our ro.client1 because when we make a request, the claims aren’t added to the user’s access token automatically. But IdentityServer4 provided an extensibility point to achieve this.
Here we add the claim to ProfileDataRequestContext instance, which in turn add the claims to our access token.
Creating a Client To Access The API
Access To API With ClientCredentials
The last step is to create a client to consume the API. First let’s see how we can access the API when we use the ClientCredentials grant type.
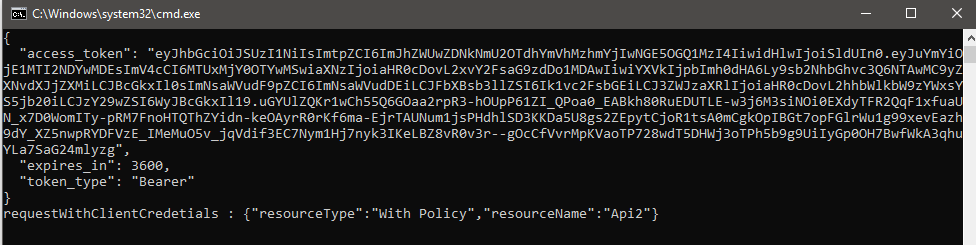
This code need the package IdentityModel to work. It contains a set of extension methods that make it easier to access our resource. On line 5, we’ve created an endpoint and use that endpoint in line 6 to create a token client. We create a new TokenClient by passing the TokenEndpoint of openIdConnectEndPoint along with our username and password to its constructor. Finally on line 7, we make a request to that authority which is on localhost:5000 by calling RequestClientCredentialsAsync and request an access token for a resource named Api1. Now that we’ve acquired an access token, we go ahead and create an HttpClient and on line 24 set the access token with SetBearerToken method. Here’s what we get after making a request.
Access To API With ResourceOwnerPassword
When we use the grant type of resource owner password, we need to provide the username and password of the user along with our client credentials.
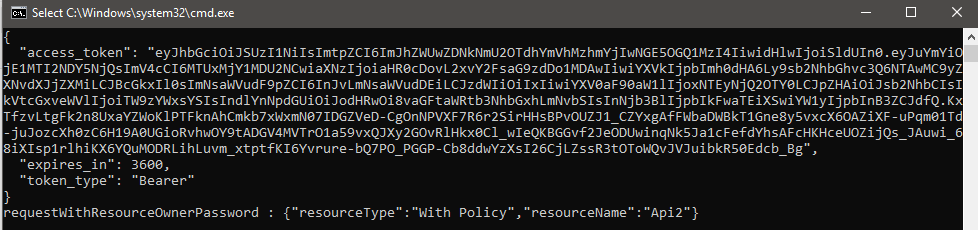
The code above is almost identical to the previous code. The only difference is instead of calling RequestClientCredentialsAsync we call RequestResourceOwnerPasswordAsync. We pass the resource name along with our username and password which we registered in IdentityServer4 config. By doing this IdentityServer4 uses the client that required username and password and adds the claims to the generated access token. Here’s what we’ll get after making a request.
Policy-based Authorization using IdentityServer4 and Asp.Net Core Identity
In this section I’m going to explain how we can use IdentityServer4 to not only secure our API, but also our Asp.Net MVC app. Before reading on, I wanted you to know that I created a working sample for you just in case my explanation wasn’t adequate. Implementing Single sign-on is very easy with IdentityServer4. In next couple of paragraphs, I’m going to explain how to do that. Also we’ll take a look at how to mix that with policy-based authorization which is based on the built-in claim feature of Asp.Net Core 2 Identity.
Creating A Secured API Using IdentityServer4
Let’s assume we have a Asp.Net Core project that contains our API and we want to secure it. The first step we need to take is to install the IdentityServer4.AccessTokenValidation package which contains the middleware that helps us validate JWT. I chose the port 5001 for this app. After we’ve added the package and set the port number, we need to add our DI container.
Here we specified who is the authority for authentication and authorization of this application. In other words, we delegate the responsibility of securing our application to a centralized location. Which means by using this approach any application can delegate this responsibility to our Identity server. All it has to do is to tell where is this centralized server and this is exactly what we’re doing here. We also should declare the name of our app, which in this case is Api1. We later use this name when we want to implement our centralized Identity server. Also notice that we’ve added the Founder policy, which we’re going to use in this app to secure the API. Now we can use the policy that we’ve defined in our startup.cs to secure the app.
Now anyone who want to access our API, needs to go to the authority (localhost:5000), and get the necessary access token.
Creating A Secured Web App Using IdentityServer4
In this part we also delegate the security of another application to the identity server. This time it’s not an API, but a Asp.Net Core web project and I’ve chosen the 5002 port number for it. Here’s how we set it up.
Here we’re telling our app to delegate the responsibility of authentication to a server located on localhost:5000 address. When this application goes to that server for authentication it needs to prove that it has already registered in that identity server as a valid client. We do that by setting the ClientId and ClientSecret property. We’ll register a client in our centralized server configuration later. Also we have to set the GetClaimsFromUserInfoEndpoint and SaveTokens property to true, otherwise the identity server doesn’t going to send the user’s claim alongside with authentication cookie. If there was any other application that we wanted to access from this web app, we can do it by adding it as a scope. Finally we register the needed policy. Now we can go ahead and restrict the access to certain area of our app.
Now anyone wants to access the Secure page, get redirected to the identity server to authorize itself. What’s left to do is to actually build a server that is responsible for all the security related matters.
Creating The Identity Server (Authority)
First step is to add an ordinary Asp.Net Core project and change the authentication type to “Individual User Accounts”. Also you need to add the IdentityServer4.AspNetIdentity to this project. Now set the port number to the value that we’ve used in other projects as authority, namely port 5000. Now that the basic structure is in place, we need to configure the server and register the resources and clients by creating a class to hold the config data. Later we use this class in the startup.cs to configure IdentityServer4.
If you remember the Creating A Secured API phase, we gave our API a name, here we use that name to register that API in our identity server.
The method GetIdentityResources is responsible for adding support for the standard openid and profile (first name, last name etc..) scopes.
The method GetClients registers a client which in this case is the Asp.Net Mvc app that we previously created. Remember that in our web app we needed to set the client secret and and id? Well, we first register the client id and secret here before using it in the web app. Next step is setting the RedirectUris and PostLogoutRedirectUris , we’re telling the identity server where the client should be redirected after login or logout. In AllowedScopes property we set what kind of information or resources this client can have access to. Next we should tell the identity server to send the claims of our client along with the cookie by setting the AlwaysSendClientClaims and AlwaysIncludeUserClaimsInIdToken to true. Finally we need to register the IdentityServer4 with the configurations that we just created to our startup.cs.
Just like before, we have the AddProfileService method which adds the class ProfileService to our container. We need this because we use a policy that requires a claim Employee to be present. But also because when we make a request, the claims aren’t added to the access token automatically. But IdentityServer4 provides an extensibility point to do this.
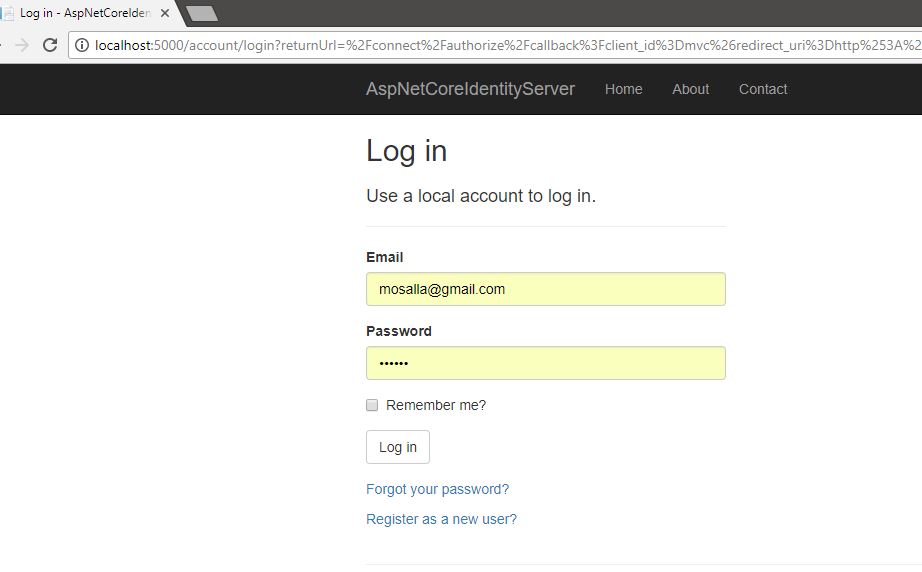
If you run the sample project that I’ve mentioned and want to access the address localhost:5002/Home/Secure, you’ll get redirected to localhost:5000/account/login which is the authority who can confirm our rights to access that page.
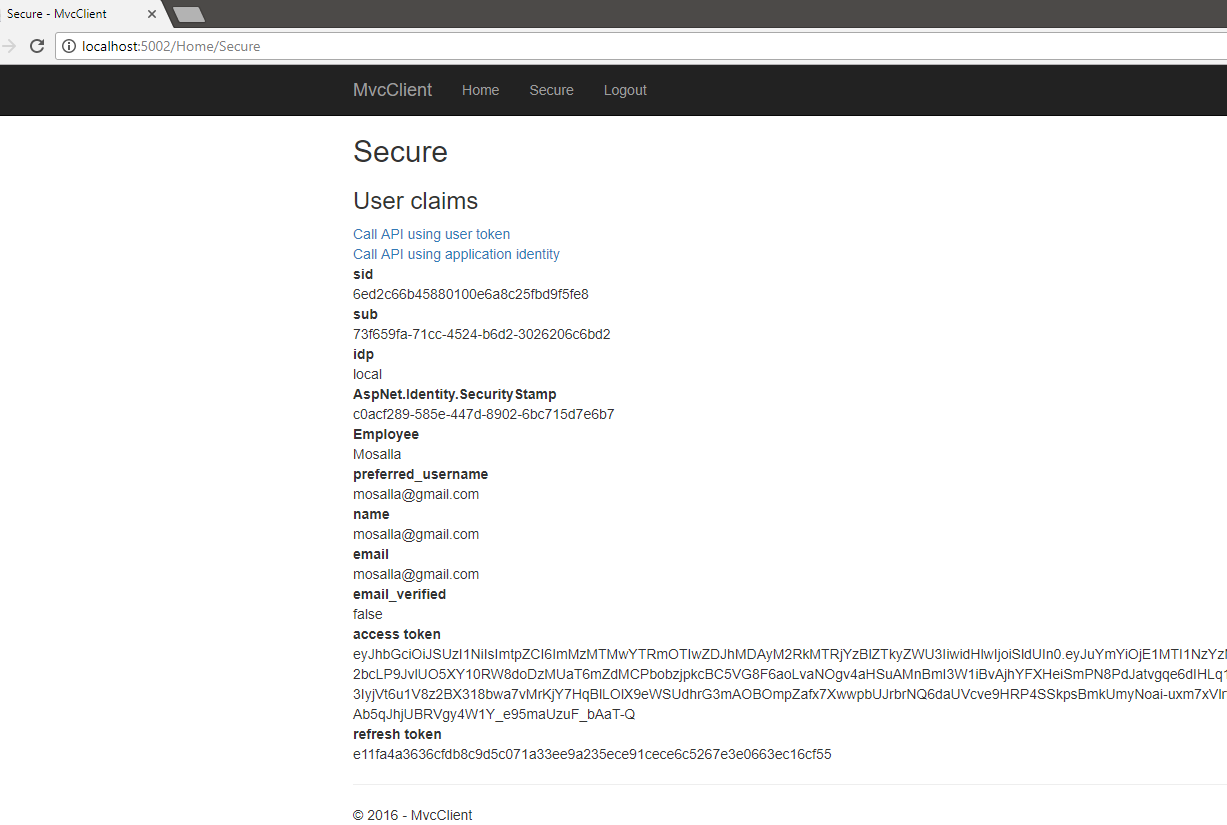
Go ahead and create a user and login and you’ll see that I’ve created an action method in /Home/AddEmployeeClaim . It adds the claim for whoever visits that page. I know it is an awful thing to do in normal circumstances But for simplicity’s sake, it works for this example. Now try again to access the Secure method and this time you can successfully see the secured page.
Accessing The Secured API
Now that we’ve authenticated with the identity server, we are authorized to make a request to the API resource that we’ve secured.
Now if we need to access a remote resource that is secured and was in our scope for access, we can do it by calling the GetTokenAsync method on our HttpContext and ask for access token. Also we can directly get an access token using the registered client if we need to bypass the whole process.
Now if we have another app that needs authentication or authorization, all we have to do is to add another client and its scopes. This is a good thing because if we have multiple applications, their security concerns isn’t scattered around different servers. That means now managing security is easier and more effective, because we have a centralized server which is responsible for it.
Update 27 September 2022
I’ve made another repository based on the things I’ve explained here with the latest version of IdentityServer4. The repository can be found here.
Summary
In this post, I’ve discussed two different ways of using IdentityServer4 to implement policy-based authorization. First I’ve described how to use it without involving the Asp.Net Core Identity using only what IdentityServer4 gives us. Then we saw how to use the built-in mechanisms of Asp.Net Identity achieve almost the same thing.
Hi, Hamid, I hope you can help…
Firstly, I really like this tutorial. Securing an API through Authorization policies is cool, but, what if you also wanted to secure the MVC Client that is calling the API with Authorization policies. The Identity Resources are added as scopes , and stored in the access token, which the api can resolve against the context current user. But these User Claims are not available to the MVC Client, nder the context.User.Claims, is it fair to say, that the Authorization policies aare api specific? or can we use them to protect controller methods in the MVC client itself?
No it is not API specific, take a look at this: https://github.com/HamidMosalla/OAuth2-OpenIDConnect-JWT-Samples/blob/master/IdentityServer4-AspNetCore-Claim/MvcClient/Controllers/HomeController.cs, as you can see here I’ve used `[Authorize(“Founder”)]` on my action, the Founder policy requires an Employee claim to be present, and I’ve called`CallApiUsingUserAccessToken` after user have logged in with the authority and got its access token. Also the claims are available, if they were not, you couldn’t access the `Secure` action method in this instance.
Can you help me? my claims is empty? i can’t figure out why
Hi
I followed your guide but it’s not working
would you check my question on stackoverflow.com ?
https://stackoverflow.com/questions/53976553/identityserver4-role-based-authorization-for-web-api-with-asp-net-core-identity/53977681#53977681
Thank you